Project: Entry to 3D Printing with Adafruit Gizmo Ornaments
I am a FIRST Robotics Competition mentor. This year one of our students is interested in robot bling, so I saw an opportunity to step into the world of LEDs and colored blinky lights. Before the holidays, I decided to check out CircuitPython, an open-source programming language derived from MicroPython, focused on education. CircuitPython is developed by Adafruit and targeted towards some of their development boards, which I used a Trinket M0 that my husband had lying around. It is definitely a fun development platform and it got my creative juices flowing!
During winter break, Tarkan (our son) introduced me to the world of 3D printing, and I learned about Thingiverse. There I found Adafruit’s Gizmo Ornaments. What could be better than a blinking holiday ornament, especially at this time of year?! The first part of this article will cover my notes about the 3D printing process, and later (when my parts arrive) I will update my project with actual blinking lights.
Our 3D Printing Setup
We have a Monoprice MP Mini Delta 3D Printer which Tarkan diligently maintains during his visits. Going forward I will refer to the printer as MPMD.
3D printing is a process of making physical objects from a three-dimensional digital model, i.e. the object’s CAD representation. The 3D printing process, also known as additive manufacturing, creates three dimensional objects by extruding materials, known as filament, one layer at a time as specified by its model.
Similar to PDF for document printers, 3D models are also described in a portable digital document format known as STL. Object models can be downloaded from Thingiverse in STL files. However, MPMD (and most other 3D printers) supports the G-code language to describe how to build the object. As the 3D printing process is additive and layered, the STL model needs to be preprocessed by “slicing” software, which divides the 3D model into individual horizontal layers built up of filament paths. Then it converts these slices into movement and extrusion operations and saves them as ready-to-print G-code commands on an SD card. By reading this file, the 3D printer can follow the sequence of commands and reproduce the actions required to create the object.
Given this, my setup required:
- Selecting a CAD package for creating 3D models and exporting the corresponding STL file. I installed Autodesk Fusion 360 for hobbyists.
- Installing Ultimaker Cura for slicing the STL files and preparing them to be printed by our 3D printer.
- Cura does not support MPMD out of the box, so a printer profile needs to be installed to ensure proper slicing of the 3D model/STL file to code that our printer understands. See here for detailed instructions.
- The printer profile can be further customized by providing a printer specific start and end G-code sequence. Did I mention Tarkan was diligent at getting our printer to top shape? He also tweaked the start.gcode sequence to ensure a successful print, including needed calibration information.
Tips/Techniques to Watch for
The Internet is full of 3D files for printing. These STL files can be opened in Cura. Prior to printing, it is advised to slice and preview the model to ensure a successful print. Specifically you should check for:
- Quality of adhesion to the print bed — raft setting will lay down a few base layers before printing the model to help it stick to the bed.
- Verify no overhangs, sharp angles, or free floating sections — support setting will provide structures to support the overhangs in the model.
I also recommend good SD card organization and clear file names for the digital files as you’ll likely reprint these parts at a later time.
Review of the 3D Prints
As they say, pictures or it didn’t happen… Here are the images I captured from this project.
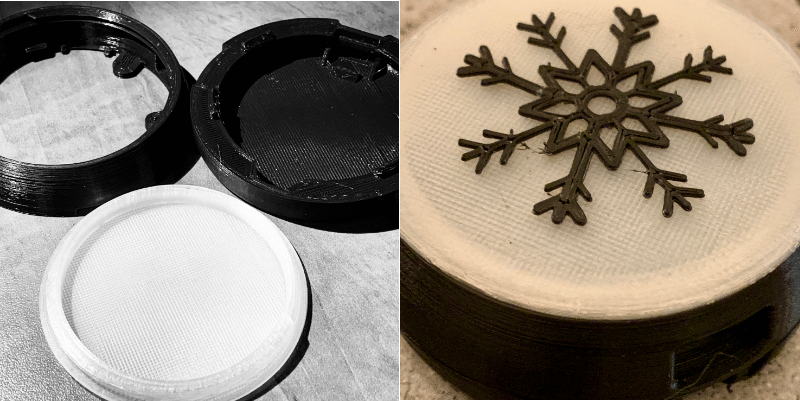
Finished Ornament
Here is a look at three parts of the ornament and how it snaps together for easy assembly. I was impressed how well the screw cover fit together. Note the interchangeable cover design.
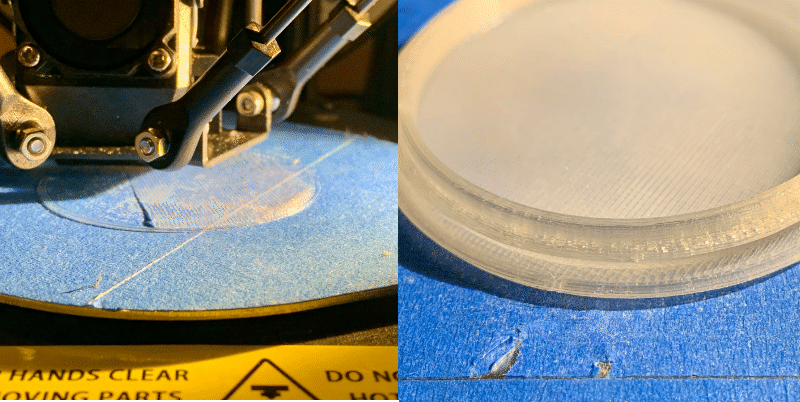
Printing the Transparent Cover
The interchangeable cover is printed with a transparent (natural) filament. It seemed to flow very fine and it was challenging to removed the final print. I included the image that shows some slight damage to the print bed.
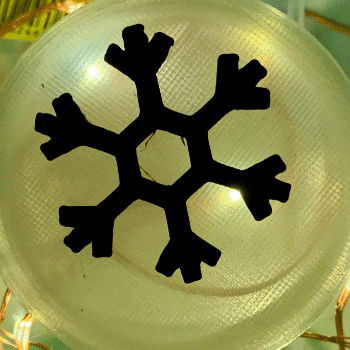
Quick Test with Lights!
I can’t resist checking the translucent lid experience :)
Next Steps
- I would like to get comfortable enough with Fusion 360 to modifying existing 3D designs and make my own models. I will be making time for some experiments around this and share my projects.
- Fully assemble the ornament and play with lights!